

Hello hello hello! My apologies for the semi-long hiatus. School just started up a few weeks ago and life has been, well, crazy. It seems that as soon as junior year kicks into gear teachers everywhere get it in their heads that now would be the perfect time to pile on more work than ever before. So get ready for a year full of procrastibaking and such 🙂
Funny thing is, this pavlova was actually a part of a homework assignment I had last weekend for this suuper cool chemistry of cooking class I’m taking this year. Okay, so the assignment was really just to make whipped cream. BUT if you’re gonna have a ridiculous amount of whipped cream on your hands you’ve just got to fashion some sort of vessel for it… right?
This course I’m taking has been great so far. It’s taught by my chemistry teacher and meets several times a week in a classroom like a normal class, but once a week we have an hour and a half session in the school’s kitchen putting what we’ve been studying to the test. The whipped cream was part of an emulsion unit (we also made homemade mayo!)
Emulsions are pretty cool. When you make one, you’re essentially taking two things that really do not want to go together and forcing them to form a more stabilized, homogenous mixture. With mayo, you’re dealing with oil and water, which, if you’ve ever made salad dressing, you probably know don’t generally like to hang out around each other. By adding an emulsifier–in this case, egg yolks–which can interact with both sides, you can form the smooth, creamy stuff that is mayonnaise. In the case of whipped cream, you’re combining the cream with air.
As you probably know if you’ve seen that post from a few months back, I loove pavlova. It’s crisp and gooey and creamy and fresh all at once. And also so easy to make, which comes in handy when you’re in the mood for a nice lazy recipe that’ll still impress.

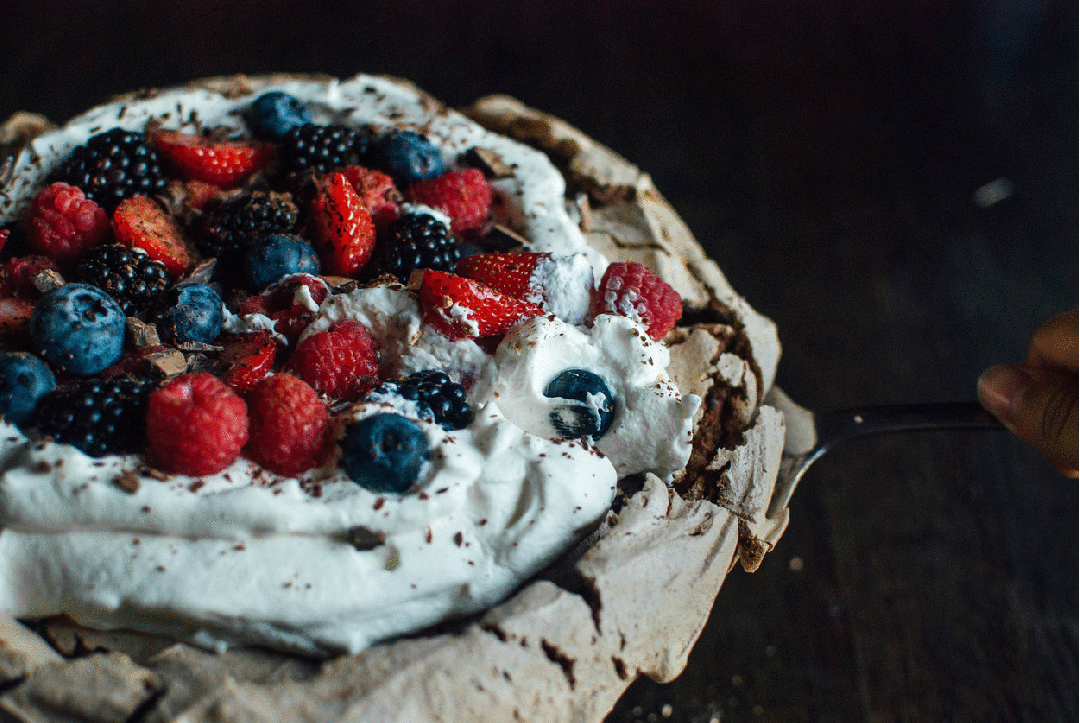
This pavlova is particularly yummy in that it’s a chocolate pav. The cocoa and chopped chocolate that are incorporated add a nice richness to an otherwise light and airy dessert. If you’re looking for a more basic vanilla version, check this one out!
Chocolate Pavlova
from crumbsandnibbles.com, adapted from Smitten Kitchen
Makes 1 large pavlova
Ingredients:
For the meringue:
- 6 large egg whites, at room temperature
- 1 1/2 cups granulated sugar
- A good pinch of sea salt
- 1 teaspoon balsamic or red wine vinegar
- 1/4 cup good cocoa powder, sifted
- 2 ounces semi- or bittersweet chocolate, finely chopped
To finish:
- 1 1/2 cups heavy cream
- 2 teaspoons granulated sugar
- 1 teaspoon vanilla extract
- 4 cups mixed fresh berries (I used blackberries, blueberries, strawberries and raspberries)
- 1 ounce semi- or bittersweet chocolate
Directions:
- Preheat the oven to 350 F. Line a large baking sheet–a 12″ depth is best–with parchment. Draw a 9″ circle on the parchment with a pencil, then flip it over so that the pencil won’t come off onto the pavlova. If you’d like to use a Silpat as I did, you can draw the circle on a sheet of paper and place it under the Silpat. Just remember to remove the paper before baking.
- First make the meringue: Place the egg whites in the bowl of a stand mixer and beat with the whisk attachment on high speed until shiny, medium peaks form. Then add the sugar a spoonful at a time, continuing to beat, until you reach stiff, glossy white peaks. Gently fold in the cocoa, salt, vinegar and chocolate using a rubber spatula.
- Spoon the meringue onto the lined baking sheet, using the circle as a guideline.
- Place the meringue in the oven and immediately lower the temperature to 300 F. Bake for 60-90 minutes (mine took somewhere in between), or until it is crisp but the middle still promises some fudginess. Turn the oven off and leave the meringue in, with the door slightly ajar, until it is completely cooled.
- When you’re ready to serve, whip the cream with the sugar and vanilla until you get soft peaks (a chilled bowl will help with this, especially on a hot day). Place the meringue on a serving platter, dollop the whipped cream onto it and finish with berries and more chopped (or shaved) chocolate. Enjoy!
Happy nibbling!
5 Comments
Dori
October 3, 2016 at 11:19 amLooks fabulous❤️
Sent from my space kitchen
bklynnibbler
October 3, 2016 at 12:18 pmThank you!
Milly
November 27, 2016 at 5:50 pmHi! 🙂
This was absolutely DELISH!!!!! It was amazing. I loved it. Love the new update to the website. I LOVE your website!
bklynnibbler
November 27, 2016 at 5:59 pmThanks so much Milly! Glad to hear it turned out yummy 🙂
Melisa
September 8, 2017 at 3:33 pmOkay, yum!